暂无评论
# 第十六章 前端精选主题管理
在上一章中,我们通过实现轮播图管理页面对Vue、LinCMS的一些基础和高级特性都有了一个初步的认识和实践,当然还包括一些设计思想上的东西。本章节要实现的功能就是精选主题内容的管理,内容相对上一章没那么复杂。和在开发后端部分内容时的套路一样,主要是通过一些功能模块的实现,来复用上一章所学的知识点,同时达到加深理解和巩固的作用。
# 精选主题列表页面
精选主题的管理同样是需要从先看到列表开始,首先我们就要来实现精选主题的列表页面。按照目录规范,我们在src/views/operation下新增一个theme文件夹,在该文件夹下,新建一个List.vue并添加如下代码:
<template>
    <div class="lin-container">
        <div class="lin-title">主题列表</div>
        <div class="button-container">
            <!-- 指定button类型 -->
            <el-button type="primary">新增</el-button>
        </div>
        <div class="table-container">
            <el-table></el-table>
        </div>
    </div>
</template>

<script>
export default {
  name: 'List',
}
</script>

<style lang="scss" scoped>
    .button-container{
        margin-top: 30px;
        padding-left: 30px;
    }

    .table-container{
        margin-top: 30px;
        padding-left: 30px;
        padding-right: 30px;
    }
</style>
1
2
3
4
5
6
7
8
9
10
11
12
13
14
15
16
17
18
19
20
21
22
23
24
25
26
27
28
29
30
31
32
2
3
4
5
6
7
8
9
10
11
12
13
14
15
16
17
18
19
20
21
22
23
24
25
26
27
28
29
30
31
32
这里同样保持一个习惯,即先搭好简单的页面骨架,让页面能够正常显示出来再完善。
页面文件和骨架代码添加完毕之后,要想让页面能够正常加载还需要添加路由配置,打开src/config/stage/operation.js,添加如下配置:
const operationRouter = {
  route: null,
  name: null,
  title: '运营管理',
  type: 'folder', // 类型: folder, tab, view
  icon: 'iconfont icon-tushuguanli', // 菜单图标
  filePath: 'views/operation/', // 文件路径
  order: 2,
  inNav: true,
  children: [
    {title: '轮播图管理'....},
    // 精选主题路由配置信息
    {
      title: '主题管理',
      type: 'folder',
      route: '/operation/theme',
      inNav: true,
      icon: 'iconfont icon-tushuguanli',
      children: [
        {
          title: '主题列表',
          type: 'view',
          route: '/operation/theme/list',
          filePath: 'views/operation/theme/List.vue',
          inNav: true,
          icon: 'iconfont icon-tushuguanli',
        },
      ],
    },
  ],
}

export default operationRouter
1
2
3
4
5
6
7
8
9
10
11
12
13
14
15
16
17
18
19
20
21
22
23
24
25
26
27
28
29
30
31
32
33
34
2
3
4
5
6
7
8
9
10
11
12
13
14
15
16
17
18
19
20
21
22
23
24
25
26
27
28
29
30
31
32
33
34
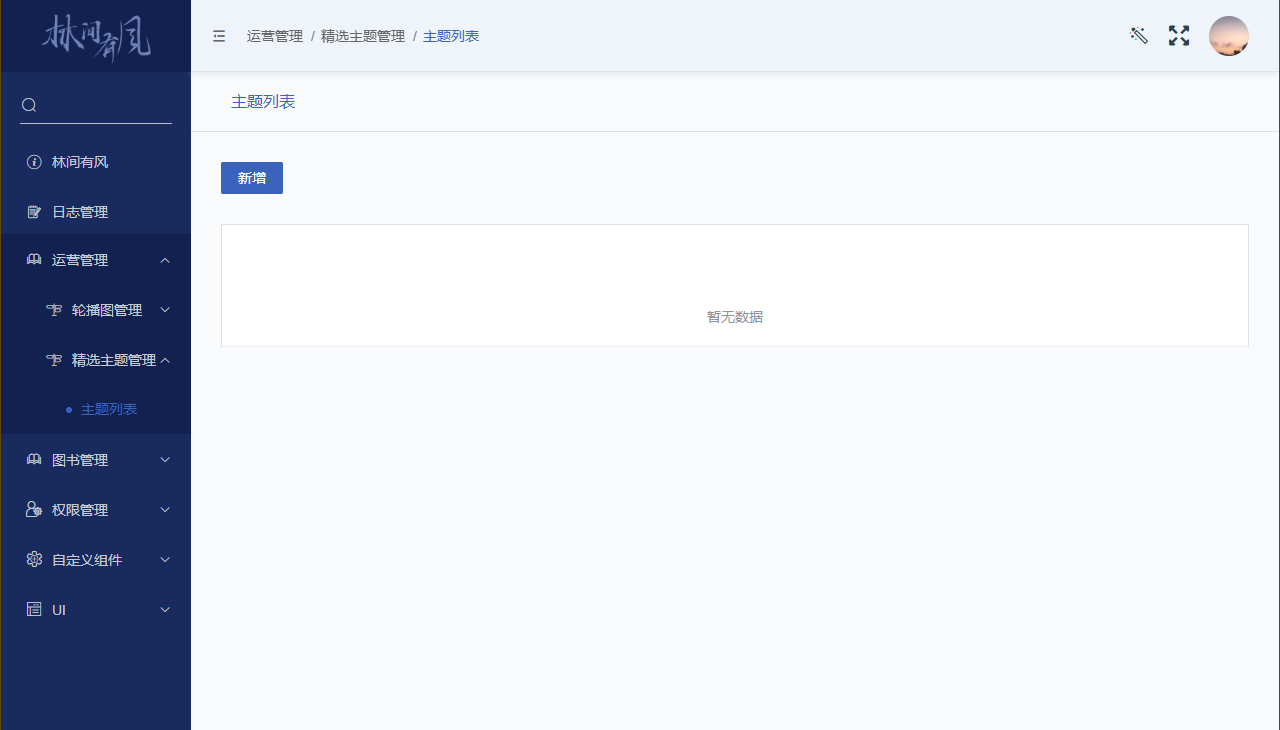
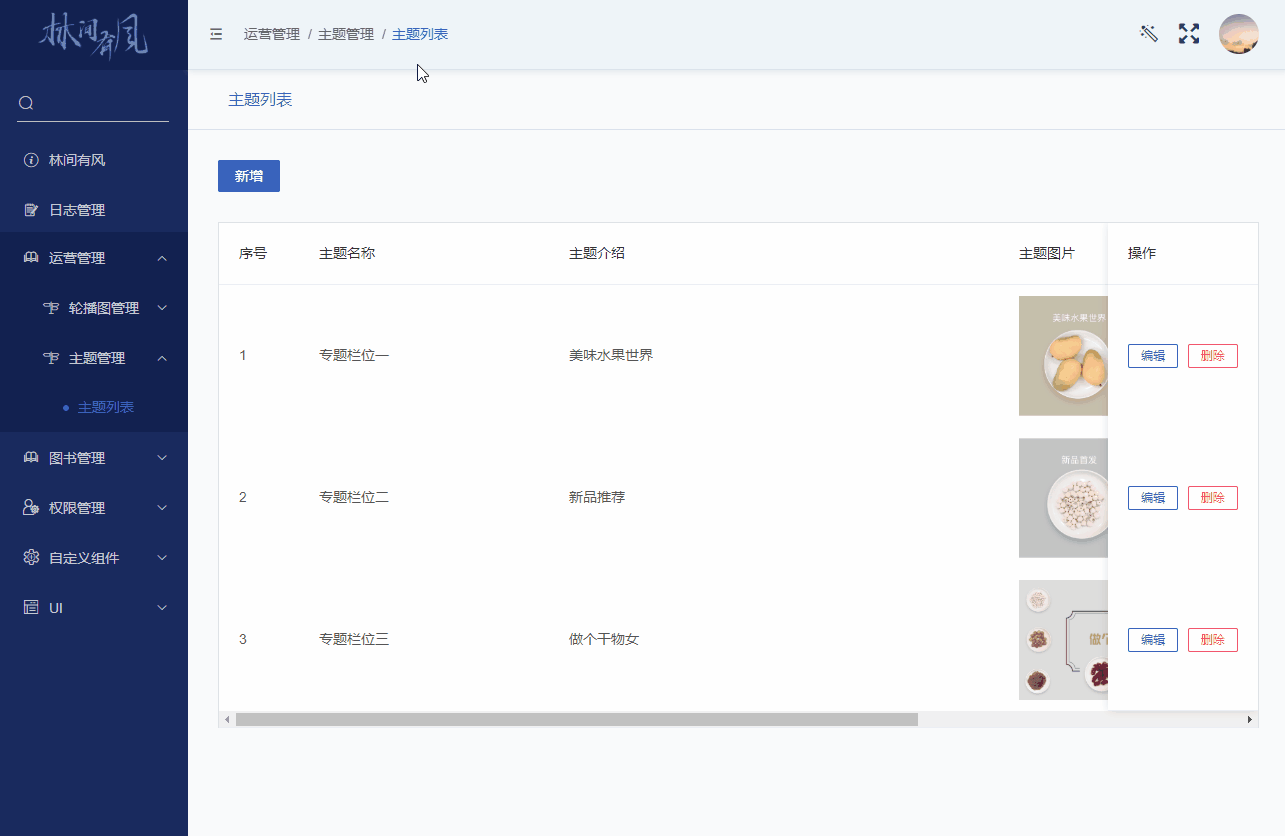
这里我们在运营管理的路由配置文件中追加了一条精选主题管理的子路由配置信息,配置完毕之后,回到我们的浏览器中,刷新一下,可以看到我们左边的菜单栏中就多出了一个精选主题管理,点击后可以看到我们之前搭好的骨架代码:
接下来我们就要让这个列表页面能够真实的加载并显示数据了,首先我们要定义一个精选主题的模型并添加一个获取列表数据的模型方法,在src/models目录下新建一个theme.js并添加如下代码:
// src/models/theme.js

import {
  get,
} from '@/lin/plugins/axios'

class Theme {

  handleError = true

  async getThemes() {
    const res = await get('v1/theme', { handleError: this.handleError })
    return res
  }
}

export default new Theme()
1
2
3
4
5
6
7
8
9
10
11
12
13
14
15
16
17
18
2
3
4
5
6
7
8
9
10
11
12
13
14
15
16
17
18
这里我们在Theme模型类中定义了一个getThemes()方法用于请求后端接口来获取信息,接着我们到List.vue中来调用一下:
<template>
    <div class="lin-container">
        <div class="lin-title">主题列表</div>
        <div class="button-container">
            <!-- 指定button类型 -->
            <el-button type="primary" @click="handleAdd">新增</el-button>
        </div>
<div class="table-container">
            <el-table v-loading="loading" :data="themeList">
                <el-table-column type="index" label="序号" width="80"/>
                <el-table-column prop="name" label="主题名称" width="250"/>
                <el-table-column prop="description" label="主题介绍" width="300"/>
                <el-table-column label="主题图片" width="250">
                    <template slot-scope="scope">
                        <img class="theme-img" :src="scope.row.topic_img.url"/>
                    </template>
                </el-table-column>
                <el-table-column label="详情页头图" width="350">
                    <template slot-scope="scope">
                        <img class="theme-img" :src="scope.row.head_img.url"/>
                    </template>
                </el-table-column>
                <el-table-column label="操作" fixed="right" min-width="150">
                    <template slot-scope="scope">
                        <el-button plain size="mini" type="primary" @click="handleEdit(scope.row.id)">编辑</el-button>
                        <el-button plain size="mini" type="danger" @click="handleDel(scope.row.id)" v-auth="'删除主题'">删除
                        </el-button>
                    </template>
                </el-table-column>
            </el-table>
        </div>
    </div>
</template>

<script>
import ThemeModel from '@/models/theme'

export default {
  name: 'List',
  data() {
    return {
      loading: false,
      themeList: [],
    }
  },
  created() {
    this.getThemes()
  },
  methods: {

    /**
     * 获取精选主题列表
     */
    async getThemes() {
      try {
        this.loading = true
        this.themeList = await ThemeModel.getThemes()
        this.loading = false
      } catch (e) {
        this.$message.error('精选主题列表加载失败')
        this.loading = false
      }
    },

    /*
     * 新增按钮点击事件
     */
    handleAdd() {
    },

    /**
     * 编辑按钮点击事件
     * @param row
     */
    handleEdit(id) {
    },

    /**
     * 删除按钮点击事件
     * @param id
     */
    handleDel(id) {
    },
  },
}
</script>

<style lang="scss" scoped>
    .button-container {
        margin-top: 30px;
        padding-left: 30px;
    }

    .table-container {
        margin-top: 30px;
        padding-left: 30px;
        padding-right: 30px;

        .theme-img {
            height: 120px;
            width: auto;
        }
    }
</style>
1
2
3
4
5
6
7
8
9
10
11
12
13
14
15
16
17
18
19
20
21
22
23
24
25
26
27
28
29
30
31
32
33
34
35
36
37
38
39
40
41
42
43
44
45
46
47
48
49
50
51
52
53
54
55
56
57
58
59
60
61
62
63
64
65
66
67
68
69
70
71
72
73
74
75
76
77
78
79
80
81
82
83
84
85
86
87
88
89
90
91
92
93
94
95
96
97
98
99
100
101
102
103
104
105
这里我们首先给<template>内添加必要的页面元素,主要是<el-table>这个组件库相关的内容,都是一些固定的用法,这里就不再重复赘述,如果有什么不清楚的可以回头看看第十五章的内容和Element UI的官方文档。
在<script>标签中,我们通过定义页面组件的生命周期函数created()实现在页面创建完成后就去调用一个我们自己定义的组件方法getThemes(),组件方法内的实现就是调用我们刚刚创建好的模型方法,在成功请求到数据之后把结果绑定给数据对象themeList实现表单数据渲染,请求失败的话则在页面给出一个错误提示,同时我们还给表单增加了一个loading加载的效果来提升用户体验。
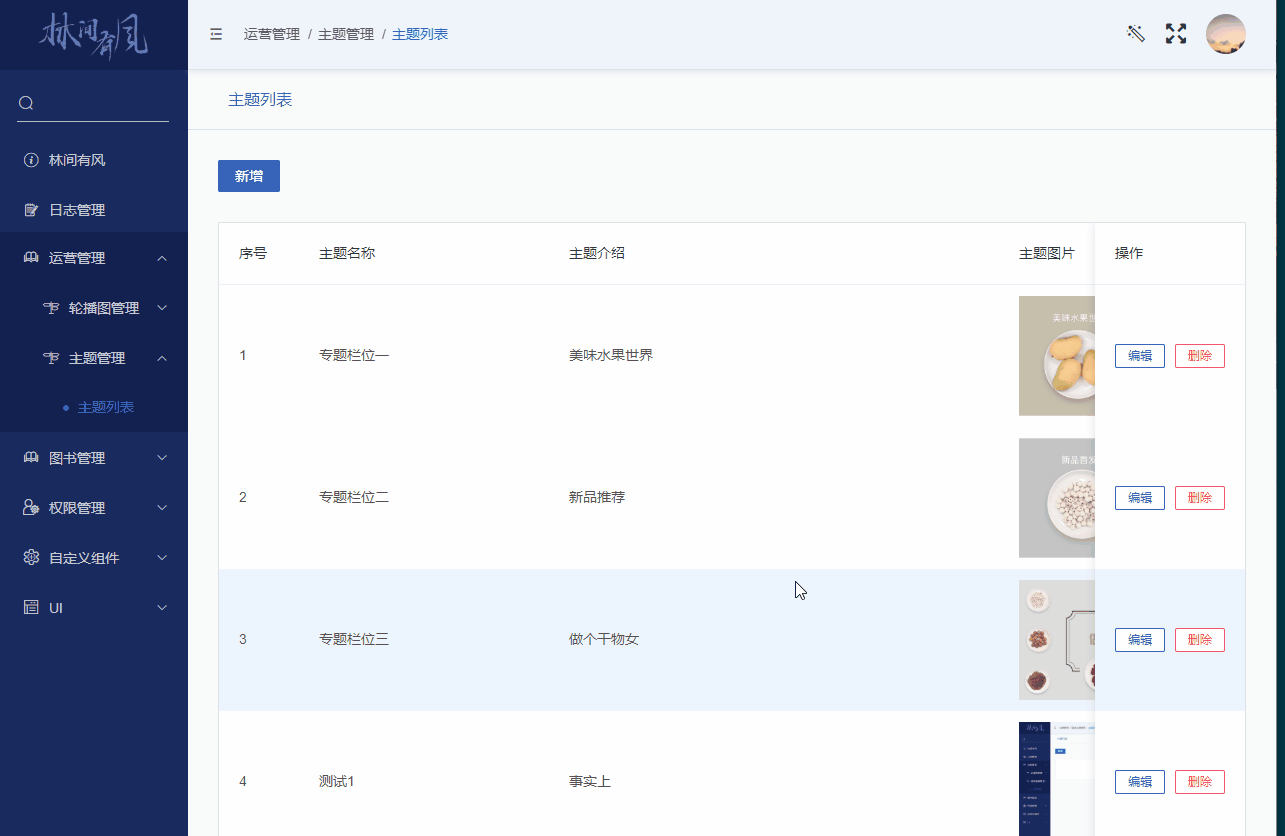
代码编写完毕后我们可以回到浏览器中来刷新一下看看效果:

显示效果还是很不错的,而且在有了上一章节的历练之后,这种列表显示的页面实现相信对各位读者来说已经是驾轻就熟了。和之前一样,我们这时候如果点击新增、编辑、删除按钮那么同样也是没有反应的,这些都会放到后面一一实现。另外还有一点就是,我们每一个精选主题下面其实会包含很多商品,在这里我们并没有选择像轮播图管理那样实现一个点击展开行的显示效果,而是选择在编辑页面和新增页面里才显示包含的商品,这么做没有什么特殊原因,纯粹是出于用户体验考虑,当然如果你觉得这里有必要实现这个点击展开行显示包含的商品,那么你也可以自己动手实现一下。
# 新增精选主题
在经过上一小节的热身之后,从这个小节开始我们将要实现些稍微复杂的东西,不过知识点和套路也同样是在上一章节中讲解过的了。首先我们从新增精选主题这个功能开始,我们同样采用之前的组件架构设计思路,就是通过切换List.vue中的显示内容来模拟页面跳转的效果,那么一些基础代码我们先来实现下,首先是List.vue中的切换逻辑实现:
<template>
    <div v-if="!switchComponent" class="lin-container">
       <!-- 省了一堆代码 -->
    </div>
    <component v-else :is="targetComponent" :themeId="id" @back="handleBack"/>
</template>

<script>
import ThemeModel from '@/models/theme'
import Add from './Add'

export default {
  name: 'List',
  data() {
    return {
      switchComponent: false,
      targetComponent: '',
      loading: false,
      themeList: [],
      id: null,
    }
  },
  created() {
    this.getThemes()
  },
  methods: {

    /**获取精选主题列表*/
    async getThemes() {...},

    /*
     * 新增按钮点击事件
     */
    handleAdd() {
      this.switchComponent = true
      this.targetComponent = 'Add'
    },

    /**编辑按钮点击事件*/
    handleEdit(id) {...},

    /**删除按钮点击事件*/
    handleDel(id) {...},

    /**
     * 监听子组件的返回按钮事件
     */
    handleBack() {
      this.switchComponent = false
      this.targetComponent = ''
      this.getThemes()
    },
  },
  components: {
    Add,
  },
}
</script>
1
2
3
4
5
6
7
8
9
10
11
12
13
14
15
16
17
18
19
20
21
22
23
24
25
26
27
28
29
30
31
32
33
34
35
36
37
38
39
40
41
42
43
44
45
46
47
48
49
50
51
52
53
54
55
56
57
58
59
2
3
4
5
6
7
8
9
10
11
12
13
14
15
16
17
18
19
20
21
22
23
24
25
26
27
28
29
30
31
32
33
34
35
36
37
38
39
40
41
42
43
44
45
46
47
48
49
50
51
52
53
54
55
56
57
58
59
细心的你可以发现,这里完全和我们之前在实现轮播图列表页面切换新增和编辑组件的逻辑是一样的。是的,没错!要注意的是这里我们需要在同级目录下创建一个Add.vue文件,不然会提示找不到组件:
<!-- src/views/operation/theme/Add.vue -->
<template>
    <div class="container">
        <div class="header">
            <span>新增主题</span>
            <span class="back" @click="handleBack">
                <i class="iconfont icon-fanhui"/> 返回
            </span>
        </div>
        <el-divider/>
        <div class="form-container">
            <el-row>
                <el-col :lg="16" :md="20" :sm="24" :xs="24">
                    <!--表单区域-->
                </el-col>
            </el-row>
        </div>
    </div>
</template>

<script>

export default {
  name: 'Add',
  methods: {

    /**
     * 处理返回按钮点击事件
     */
    handleBack() {
      this.$emit('back')
    },
  },
}
</script>

<style lang="scss" scoped>
    .el-divider--horizontal {
        margin: 0
    }

    .container {

        .header {
            height: 59px;
            line-height: 59px;
            color: $parent-title-color;
            font-size: 16px;
            font-weight: 500;
            text-indent: 40px;

            .back {
                float: right;
                margin-right: 40px;
                cursor: pointer;
            }
        }

        .form-container {
            padding: 20px 20px 40px 20px;
        }
    }
</style>
1
2
3
4
5
6
7
8
9
10
11
12
13
14
15
16
17
18
19
20
21
22
23
24
25
26
27
28
29
30
31
32
33
34
35
36
37
38
39
40
41
42
43
44
45
46
47
48
49
50
51
52
53
54
55
56
57
58
59
60
61
62
63
64
2
3
4
5
6
7
8
9
10
11
12
13
14
15
16
17
18
19
20
21
22
23
24
25
26
27
28
29
30
31
32
33
34
35
36
37
38
39
40
41
42
43
44
45
46
47
48
49
50
51
52
53
54
55
56
57
58
59
60
61
62
63
64
这里同样是很熟悉的代码,在添加完毕之后让我们回到浏览器中,尝试点击新增按钮,测试下切换效果,在确认没有任何异常之后,我们新增精选主题页面的骨架就算是搭好了,接下来我们就要像之前实现轮播图管理那样,也为精选主题管理封装一个Form.vue文件,在src/views/operation/theme目录下新增一个components文件夹,在这个文件夹下面新建一个Form.vue文件并添加如下代码:
<template>
<div class="container">
<!-- 主题基础信息 -->
<div class="theme-fox">
<el-form :model="temp" :rules="rules" status-icon ref="form" label-width="100px" @submit.native.prevent>
<el-form-item label="名称" prop="name">
<el-input size="medium" v-model="temp.name" placeholder="精选主题名称"></el-input>
</el-form-item>
<el-form-item label="简介" prop="description">
<el-input v-model="temp.description" size="medium" type="textarea" :rows="4" placeholder="精选主题简介"/>
</el-form-item>
<el-form-item label="主题图" prop="topic_img.id">
<upload-imgs ref="uploadTopic" :max-num="1" :value="topicImgInitData" :remote-fuc="uploadImage"/>
</el-form-item>
<el-form-item label="详情页头图" prop="head_img.id">
<upload-imgs ref="uploadHead" :max-num="1" :value="headImgInitData" :remote-fuc="uploadImage"/>
</el-form-item>
</el-form>
</div>
<!-- 主题关联商品列表 -->
<div class="product-fox">
<div class="product-fox-title">关联商品</div>
<div class="theme-product-options">
<el-button @click="handleChange">更改</el-button>
<!-- <el-button @click="handleDelProduct">删除</el-button>-->
</div>
<div class="theme-product-table">
<el-table :data="temp.products" style="width: 100%">
<el-table-column type="index" width="55"/>
<el-table-column label="商品名称" prop="name"/>
<el-table-column label="单价" prop="price"/>
<el-table-column label="剩余库存" prop="stock"/>
<el-table-column label="商品摘要" prop="summary"/>
</el-table>
</div>
</div>
<!-- 页面保存及重置按钮 -->
<div class="submit-box">
<el-button @click="resetForm">重 置</el-button>
<el-button type="primary" @click="saveForm('form')">保 存</el-button>
</div>
<!-- 更改主题关联商品对话框 -->
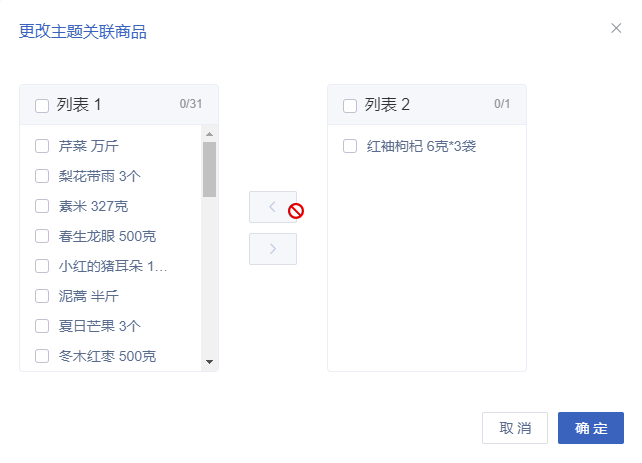
<el-dialog title="更改主题关联商品" :visible.sync="changeDialogVisible">
<el-transfer v-loading="loading" v-model="selectedTransfer" :data="transferList"></el-transfer>
<span slot="footer" class="dialog-footer">
<el-button @click="changeDialogVisible = false">取 消</el-button>
<el-button type="primary" @click="handleConfirmChange">确 定</el-button>
</span>
</el-dialog>
</div>
</template>
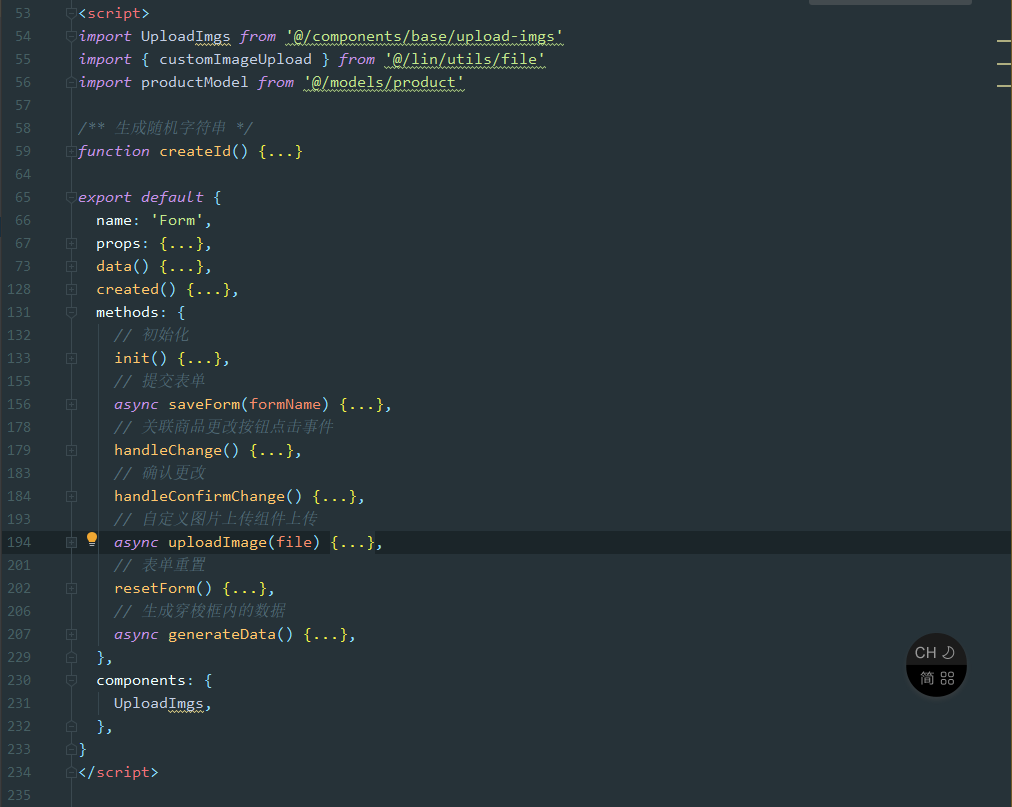
<script>
import UploadImgs from '@/components/base/upload-imgs'
import { customImageUpload } from '@/lin/utils/file'
import productModel from '@/models/product'
/** 生成随机字符串 */
function createId() {
return Math.random()
.toString(36)
.substring(2)
}
export default {
name: 'Form',
props: {
data: {
type: Object,
default: null,
},
},
data() {
return {
transferList: [],
selectedTransfer: [],
temp: {
id: undefined,
name: '',
description: '',
topic_img: {
id: '',
url: '',
},
head_img: {
id: '',
url: '',
},
products: [],
},
loading: false,
changeDialogVisible: false,
productList: [],
topicImgInitData: [],
headImgInitData: [],
rules: {
name: [
{
required: true,
message: '请输入主题名称',
trigger: 'blur',
},
],
description: [
{
required: true,
message: '主题简介不能为空',
trigger: 'blur',
},
],
'topic_img.id': [
{
required: true,
message: '主题图片不能为空',
trigger: 'blur',
},
],
'head_img.id': [
{
required: true,
message: '主题详情页头图不能为空',
trigger: 'blur',
},
],
},
}
},
created() {
this.init()
},
methods: {
// 初始化
init() {
// 如果有传入data就赋值给temp,没有就保持原来的temp,对应新增和编辑的场景
this.temp = this.data != null ? JSON.parse(JSON.stringify(this.data)) : this.temp
// 初始化主题图图片组件
const topicImgInitData = {
id: createId(),
imgId: this.temp.topic_img.id,
display: this.temp.topic_img.url,
}
// 初始化主题详情页头图图片组件
const headImgInitData = {
id: createId(),
imgId: this.temp.head_img.id,
display: this.temp.head_img.url,
}
this.topicImgInitData = []
this.topicImgInitData.push(topicImgInitData)
this.headImgInitData = []
this.headImgInitData.push(headImgInitData)
},
// 提交表单
async saveForm(formName) {
if (this.temp.products.length < 1) {
this.$message.error('主题关联商品不能为空')
return
}
const topicImg = await this.$refs.uploadTopic.getValue()
const headImg = await this.$refs.uploadHead.getValue()
if (topicImg[0].imgId) {
this.temp.topic_img.id = topicImg[0].imgId
}
if (headImg[0].imgId) {
this.temp.head_img.id = headImg[0].imgId
}
this.$refs[formName].validate(async (valid) => {
if (valid) {
this.$emit('submit', this.temp)
}
})
},
// 关联商品更改按钮点击事件
handleChange() {
this.generateData()
this.changeDialogVisible = true
},
// 确认更改
handleConfirmChange() {
const newProductList = []
this.selectedTransfer.forEach((id) => {
const item = this.productList.find(product => product.id === id)
newProductList.push(item)
})
this.temp.products = newProductList
this.changeDialogVisible = false
},
// 自定义图片上传组件上传
async uploadImage(file) {
const res = await customImageUpload(file)
return Promise.resolve({
id: res[0].id,
url: res[0].url,
})
},
// 表单重置
resetForm() {
this.init()
// this.selectedTransfer = []
},
// 生成穿梭框内的数据
async generateData() {
const data = []
try {
this.loading = true
this.productList = await productModel.getProducts()
this.loading = false
} catch (e) {
this.productList = []
this.loading = false
}
// 生成所有商品的列表
for (let i = 0; i < this.productList.length; i++) {
data.push({
key: this.productList[i].id,
label: this.productList[i].name,
})
}
this.transferList = data
// 初始化已选择的商品选项
this.selectedTransfer = []
this.temp.products.map(product => this.selectedTransfer.push(product.id))
},
},
components: {
UploadImgs,
},
}
</script>
<style lang="scss" scoped>
.container {
.product-fox {
.product-fox-title {
height: 59px;
line-height: 59px;
color: $parent-title-color;
font-size: 16px;
font-weight: 500;
}
.theme-product-options {
margin-bottom: 20px;
}
}
.submit-box {
margin-top: 20px;
text-align: center;
}
}
</style>
1
2
3
4
5
6
7
8
9
10
11
12
13
14
15
16
17
18
19
20
21
22
23
24
25
26
27
28
29
30
31
32
33
34
35
36
37
38
39
40
41
42
43
44
45
46
47
48
49
50
51
52
53
54
55
56
57
58
59
60
61
62
63
64
65
66
67
68
69
70
71
72
73
74
75
76
77
78
79
80
81
82
83
84
85
86
87
88
89
90
91
92
93
94
95
96
97
98
99
100
101
102
103
104
105
106
107
108
109
110
111
112
113
114
115
116
117
118
119
120
121
122
123
124
125
126
127
128
129
130
131
132
133
134
135
136
137
138
139
140
141
142
143
144
145
146
147
148
149
150
151
152
153
154
155
156
157
158
159
160
161
162
163
164
165
166
167
168
169
170
171
172
173
174
175
176
177
178
179
180
181
182
183
184
185
186
187
188
189
190
191
192
193
194
195
196
197
198
199
200
201
202
203
204
205
206
207
208
209
210
211
212
213
214
215
216
217
218
219
220
221
222
223
224
225
226
227
228
229
230
231
232
233
234
235
236
237
238
239
240
241
242
243
244
245
246
247
248
249
250
251
252
253
254
255
256
257
258
此刻小朋友你心里是不是有很多问号?不要紧,本质上和我们之前封装轮播图管理的表单组件思路是差不多的,只不过做了一些微调而已。在开始解读精选主题管理的Form.vue具体实现之前,我们需要先实现一个新的模型类和模型方法,因为Form.vue中使用到了这个模型方法。在src/models下新建一个product.js文件并添加如下代码:
import {
  get,
} from '@/lin/plugins/axios'

class Product {

  /**
   * 获取所有商品,不分页
   * @returns {Promise<*>}
   */
  async getProducts() {
    const res = await get('v1/product')
    return res
  }
}

export default new Product()
1
2
3
4
5
6
7
8
9
10
11
12
13
14
15
16
17
2
3
4
5
6
7
8
9
10
11
12
13
14
15
16
17
这个方法用于提供商品列表数据作为穿梭框的选项,具体可以看
generateData()方法的实现
接下来我们就来大致解读一下Form.vue的实现内容,首先是<template>部分的内容:
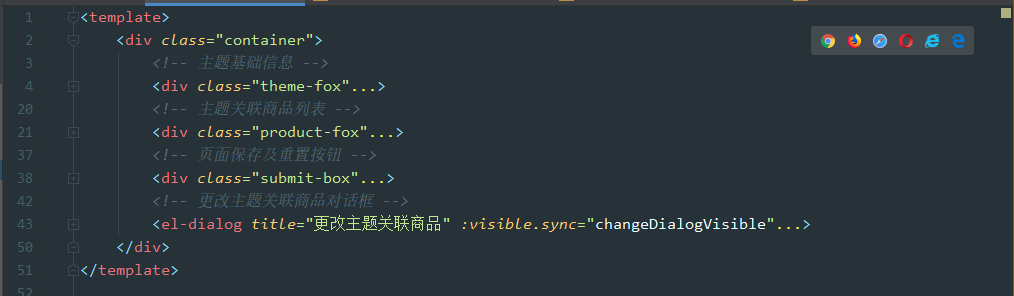
<template>中的内容乍一看有一堆的东西,但其实如果折叠起来的话结构还是很清晰的,就是分为这几部分,每个部分的内容都是一些UI库的固定使用方法,这里不再重复赘述。这里面和上一章轮播图管理的表单组件对比,因为没有动态的表单项,所以复杂度降低了不少(特别是图片上传组件部分),另外我们引入了一个新的Element UI组件库——穿梭框(el-transfer)用于提供更改主题关联商品时交互操作:
<script>中的内容主要是我们这个表单组件的逻辑实现。思路和之前一样,就是只维护表单本身的数据和业务逻辑,最后只负责把经过校验的合法数据通过事件传递给调用这个表单组件的父组件。
通过查看具体某个方法的实现,可以发现其实就是在不断的获取数据、格式化数据,以前我看到类似的功能模块时,会很困惑这里要为什么要这么写,是有什么讲究吗?其实没有,就是为了拿到自己想要或者组件库想要的数据格式而已,也就是说,只要能格式化出想要的数据,怎么写都是可以的。
定义完Form.vue组件之后,我们就可以回到Add.vue中来调用了:
<!-- src/views/operation/theme/Add.vue -->
<template>
    <div class="container">
        <div class="header">
            <span>新增主题</span>
            <span class="back" @click="handleBack">
                <i class="iconfont icon-fanhui"/> 返回
            </span>
        </div>
        <el-divider/>
        <div class="form-container">
            <el-row>
                <el-col :lg="16" :md="20" :sm="24" :xs="24">
                    <theme-form @submit="handleSubmit"/>
                </el-col>
            </el-row>
        </div>
    </div>
</template>

<script>
import ThemeForm from './components/Form'
import themeModel from '@/models/theme'

export default {
  name: 'Add',
  components: { ThemeForm },
  methods: {
     /**
     * 处理表单组件的提交事件
     */
    async handleSubmit(formData) {
      try {
        // 调用新增精选主题接口
        const res = await themeModel.createTheme(formData.name, formData.description, formData.topic_img.id, formData.head_img.id)
        // 将商品关联到新增的主题
        const productIds = formData.products.map(p => p.id)
        await themeModel.addThemeProduct(res.result.id, productIds)
        // 页面消息提示
        this.$message.success('精选主题新增成功')
        this.handleBack()
      } catch (e) {
        const msg = Object.values(e.data.msg).join(';')
        this.$message.error(msg)
      }
    },

    /**处理返回按钮点击事件*/
    handleBack() {...},
  },
}
</script>

<style lang="scss" scoped>...</style>
1
2
3
4
5
6
7
8
9
10
11
12
13
14
15
16
17
18
19
20
21
22
23
24
25
26
27
28
29
30
31
32
33
34
35
36
37
38
39
40
41
42
43
44
45
46
47
48
49
50
51
52
53
54
55
2
3
4
5
6
7
8
9
10
11
12
13
14
15
16
17
18
19
20
21
22
23
24
25
26
27
28
29
30
31
32
33
34
35
36
37
38
39
40
41
42
43
44
45
46
47
48
49
50
51
52
53
54
55
我们在Add.vue中引入了Form.vue组件,为了和原生的form标签有个明显的区分,我们引入时的具体名称使用ThemeForm。Add.vue中要做的事件很简单,就是监听表单组件的提交事件,这里我们定义了一个handleSubmit()方法用于处理表单提交的事件,在这个方法内我们主要做了两件事情,一是调用新增精选主题的接口,成功后拿到主题Id。二是调用新增主题关联商品接口给这个主题关联上商品。这两个接口调用的模型方法我们还没实现,打开src/models/theme.js并添加如下代码:
// src/models/theme.js

import {
  get,
  post,
} from '@/lin/plugins/axios'

class Theme {

  handleError = true

  async getThemes() {
    const res = await get('v1/theme', { handleError: this.handleError })
    return res
  }

  async createTheme(name, description, topic_img_id, head_img_id) {
    const res = await post('v1/theme', {
      name,
      description,
      topic_img_id,
      head_img_id,
    }, { handleError: this.handleError })
    return res
  }

  async addThemeProduct(id,productIds) {
    const res = await post(`v1/theme/product/${id}`, {
      products: productIds,
    }, { handleError: this.handleError })
    return res
  }
}

export default new Theme()
1
2
3
4
5
6
7
8
9
10
11
12
13
14
15
16
17
18
19
20
21
22
23
24
25
26
27
28
29
30
31
32
33
34
35
36
2
3
4
5
6
7
8
9
10
11
12
13
14
15
16
17
18
19
20
21
22
23
24
25
26
27
28
29
30
31
32
33
34
35
36
添加完毕之后,我们就可以到浏览器中来尝试体验新增精选主题的完整流程了:
一切都很顺利,在下一小节中,我们就将实现通过复用Form.vue来快速实现编辑精选主题的页面模块实现,具体实现思路和方法也是和轮播图管理章节很相似的,读者不妨自己先动手尝试一下。
# 编辑精选主题
在上一小节中,我们封装了精选主题管理的通用表单组件Form.vue,在本小节我们将复用这个组件来实现编辑精选主题的页面模块功能,首先在src/views/operation/theme下创建一个Edit.vue文件并添加如下代码:
<!-- src/views/operation/theme/Edit.vue -->
<template>
    <div class="container">
        <div class="header">
            <span>编辑精选主题</span>
            <span class="back" @click="handleBack">
        <i class="iconfont icon-fanhui"></i> 返回
      </span>
        </div>
        <el-divider></el-divider>
        <div class="form-container">
            <el-row>
                <el-col :lg="16" :md="20" :sm="24" :xs="24">
                    <!-- TODO 表单组件 -->
                </el-col>
            </el-row>
        </div>
    </div>
</template>

<script>

export default {
  name: 'Edit',
  props: {
    themeId: {
      type: Number,
    },
  },
  data() {
    return {
      loading: false,
      theme: null,
    }
  },
  async created() {
  },

  methods: {
    async submitForm(formData) {
    },

    handleBack() {
      this.$emit('back')
    },
  },
}
</script>

<style lang="scss" scoped>
    .el-divider--horizontal {
        margin: 0
    }

    .container {
        .header {
            height: 59px;
            line-height: 59px;
            color: $parent-title-color;
            font-size: 16px;
            font-weight: 500;
            text-indent: 40px;

            .back {
                float: right;
                margin-right: 40px;
                cursor: pointer;
            }
        }

        .form-container {
            padding: 20px 20px 40px 20px;
        }
    }
</style>
1
2
3
4
5
6
7
8
9
10
11
12
13
14
15
16
17
18
19
20
21
22
23
24
25
26
27
28
29
30
31
32
33
34
35
36
37
38
39
40
41
42
43
44
45
46
47
48
49
50
51
52
53
54
55
56
57
58
59
60
61
62
63
64
65
66
67
68
69
70
71
72
73
74
75
76
2
3
4
5
6
7
8
9
10
11
12
13
14
15
16
17
18
19
20
21
22
23
24
25
26
27
28
29
30
31
32
33
34
35
36
37
38
39
40
41
42
43
44
45
46
47
48
49
50
51
52
53
54
55
56
57
58
59
60
61
62
63
64
65
66
67
68
69
70
71
72
73
74
75
76
Edit.vue的骨架代码添加完毕之后,我们还要回到List.vue中添加一些配置来支持从列表页面切换到这个组件:
<!-- src/views/operation/theme/List.vue -->
<template>
   <!-- 省了一堆代码 -->
</template>

<script>
import ThemeModel from '@/models/theme'
import Add from './Add'
// 引入组件
import Edit from './Edit'

export default {
  name: 'List',
  data() {...},
  created() {...},
  methods: {
    /**获取精选主题列表*/
    async getThemes() {...},
    /**新增按钮点击事件*/
    handleAdd() {...},
    /**编辑按钮点击事件*/
    handleEdit(id) {
      this.switchComponent = true
      this.targetComponent = 'Edit'
      this.id = id
    },
    /**删除按钮点击事件*/
    handleDel(id) {...},
    /**监听子组件的返回按钮事件*/
    handleBack() {...},
  },
  components: {
    Add,
    Edit,
  },
}
</script>
1
2
3
4
5
6
7
8
9
10
11
12
13
14
15
16
17
18
19
20
21
22
23
24
25
26
27
28
29
30
31
32
33
34
35
36
37
38
2
3
4
5
6
7
8
9
10
11
12
13
14
15
16
17
18
19
20
21
22
23
24
25
26
27
28
29
30
31
32
33
34
35
36
37
38
配置完毕之后,我们同样需要检验一下切换是否正常:
没有问题,如丝般顺滑。接下来我们就要实现具体的业务逻辑了,首先需要在我们的Edit.vue中引入我们的表单组件Form.vue:
<template>
    <div class="container">
        <div class="header">
            <span>编辑精选主题</span>
            <span class="back" @click="handleBack">
        <i class="iconfont icon-fanhui"></i> 返回
      </span>
        </div>
        <el-divider></el-divider>
        <div class="form-container">
            <el-row>
                <el-col :lg="16" :md="20" :sm="24" :xs="24">
                    <theme-form v-if="theme" :data="theme" @submit="submitForm"></theme-form>
                </el-col>
            </el-row>
        </div>
    </div>
</template>

<script>
import themeModel from '@/models/theme'
import ThemeForm from './components/Form'

export default {
  name: 'Edit',
  components: { ThemeForm },
  props: {
    themeId: {
      type: Number,
    },
  },
  data() {
    return {
      loading: false,
      theme: null,
    }
  },
  async created() {
    this.theme = await themeModel.getThemeById(this.themeId)
  },

  methods:{
    submitForm(formData){

    }
    handleBack() {
      this.$emit('back')
    },
  }
}
</script>

<style lang="scss" scoped>...</style>
1
2
3
4
5
6
7
8
9
10
11
12
13
14
15
16
17
18
19
20
21
22
23
24
25
26
27
28
29
30
31
32
33
34
35
36
37
38
39
40
41
42
43
44
45
46
47
48
49
50
51
52
53
54
2
3
4
5
6
7
8
9
10
11
12
13
14
15
16
17
18
19
20
21
22
23
24
25
26
27
28
29
30
31
32
33
34
35
36
37
38
39
40
41
42
43
44
45
46
47
48
49
50
51
52
53
54
这里我们引入了Form.vue组件,同样为了与原生form标签名称区分开我们采用ThemeForm作为引入的名称。与新增主题不同,在编辑主题的场景下,我们需要给ThemeForm组件的data属性传递一个主题对象供表单组件内部去渲染数据,Edit.vue本身会接收一个由List.vue点击某一行的编辑按钮后传递进来的themeId,我们在Edit.vue组件的created()生命周期函数中利用这个id去调用后端接口获取完整的主题信息,具体实现由Theme模型类下的getThemeById()来完成,我们来实现一下这个模型方法:
// src/models/theme.js

import {
  get,
  post,
} from '@/lin/plugins/axios'

class Theme {

  handleError = true
  // 获取主题列表
  async getThemes() {...}
  // 新增主题
  async createTheme(name, description, topic_img_id, head_img_id) {...}
  // 新增主题关联商品
  async addThemeProduct(id,productIds) {...}
  // 获取指定精选主题详情
  async getThemeById(id) {
    const res = await get(`v1/theme/${id}`)
    return res
  }
}

export default new Theme()
1
2
3
4
5
6
7
8
9
10
11
12
13
14
15
16
17
18
19
20
21
22
23
24
25
2
3
4
5
6
7
8
9
10
11
12
13
14
15
16
17
18
19
20
21
22
23
24
25
到这里,我们的表单组件就可以接收并渲染传递进去的主题信息,但目前我们无论做任何修改,实际都是不会生效的,原因很简单,我们还没有编写Edit.vue中表单提交事件回调方法的具体实现。在有了之前轮播图管理的开发经验,这里的实现就可以说没什么难度了,思路都是一样的:
<template>
    <!-- 省略一堆代码 -->
</template>

<script>
import themeModel from '@/models/theme'
import ThemeForm from './components/Form'

export default {
  name: 'Edit',
  components: { ThemeForm },
  props: {...},
  data() {...},
  async created() {...},

  methods:{
    // 表单提交事件处理
     async submitForm(formData) {
      try {
        // 主题信息更新的处理逻辑
        await this.updateThemeInfo(formData)
        // 主题关联商品的处理逻辑
        await this.updateThemeProduct(formData.products)
        this.$message.success('编辑成功')
        this.handleBack()
      } catch (e) {
        this.$message.error(e)
      }
    },

    async updateThemeInfo(formData) {
      const params = this._processUpdateThemeInfoParams(formData)
      if (JSON.stringify(params) !== '{}') {
        try {
          await themeModel.updateThemeInfo(this.themeId, params)
        } catch (e) {
          throw Object.values(e.data.msg)
          .join(';')
        }
      }
    },

    async updateThemeProduct(newProducts) {
      // 待新增的主题商品
      let addThemeProduct = []
      // 待移除的主题商品
      let delThemeProduct = []

      const oriProductIds = this.theme.products.map(p => p.id)
      const newProductIds = newProducts.map(p => p.id)

      if (JSON.stringify(oriProductIds) !== JSON.stringify(newProductIds)) {
        addThemeProduct = this._processAddThemeProductArray(oriProductIds, newProductIds)
        delThemeProduct = this._processDelThemeProductArray(oriProductIds, newProductIds)
      }

      try {
        // 判断是否需要发起新增主题商品
        if (addThemeProduct.length > 0) {
          await themeModel.addThemeProduct(this.themeId, addThemeProduct)
        }
        // 判断是否需要发起移除主题商品
        if (delThemeProduct.length > 0) {
          await themeModel.delThemeProduct(this.themeId, delThemeProduct)
        }
      } catch (e) {
        throw Object.values(e.data.msg)
        .join(';')
      }
    },

    // 编辑主题信息接口的参数加工函数
    _processUpdateThemeInfoParams(formData) {
      const params = {}
      if (formData.name !== this.theme.name) {
        params['name'] = formData.name
      }
      if (formData.description !== this.theme.description) {
        params['description'] = formData.description

      }
      if (formData.topic_img.id !== this.theme.topic_img.id) {
        params['topic_img_id'] = formData.topic_img.id

      }
      if (formData.head_img.id !== this.theme.head_img.id) {
        params['head_img_id'] = formData.head_img.id

      }
      return params
    },
    // 待新增的主题商品数组的加工函数
    _processAddThemeProductArray(oriProductIds, newProductIds) {
      return newProductIds.filter(newPid => {
        const product = oriProductIds.find(oriPid => oriPid === newPid)
        return typeof (product) === 'undefined'
      })
    },
    // 待移除的主题商品数组的加工函数
    _processDelThemeProductArray(oriProductIds, newProductIds) {
      return oriProductIds.filter(oriPid => {
        const product = newProductIds.find(newPid => oriPid === newPid)
        return typeof (product) === 'undefined'
      })
    },
    // 返回按钮事件处理
    handleBack() {...},
  }
}
</script>

<style lang="scss" scoped>...</style>
1
2
3
4
5
6
7
8
9
10
11
12
13
14
15
16
17
18
19
20
21
22
23
24
25
26
27
28
29
30
31
32
33
34
35
36
37
38
39
40
41
42
43
44
45
46
47
48
49
50
51
52
53
54
55
56
57
58
59
60
61
62
63
64
65
66
67
68
69
70
71
72
73
74
75
76
77
78
79
80
81
82
83
84
85
86
87
88
89
90
91
92
93
94
95
96
97
98
99
100
101
102
103
104
105
106
107
108
109
110
111
112
113
这里代码看着挺多,其实做的事情并不复杂,我们在IDE中折叠下代码,先理清下思路,忽略实现细节:
当我们监听到表单的提交事件之后会进入submitForm()方法,submitForm()里的实现就是分别调用updateThemeInfo()、updateThemeProduct(),这两个方法分别对应两个具体业务——编辑主题的基础信息和添加/移除主题下关联的商品,每个具体业务实现都会去调用相应的_processXXXX()方法,目的也就是做一些判断,格式化数据,最后判断是否存在变化决定是否调用相应后端接口,这里的实现思路读者们是不是感觉似曾相识呢?
在理清思路之后,我们来关注下具体实现,在updateThemeInfo()方法中,我们通过_processUpdateThemeInfoParams()方法来过滤出改动过的主题基础信息:
async updateThemeInfo(formData) {
    const params = this._processUpdateThemeInfoParams(formData)
    if (JSON.stringify(params) !== '{}') {
      try {
        await themeModel.updateThemeInfo(this.themeId, params)
      } catch (e) {
        throw Object.values(e.data.msg)
        .join(';')
      }
    }
},

  // 编辑主题信息接口的参数加工函数
_processUpdateThemeInfoParams(formData) {
    const params = {}
    if (formData.name !== this.theme.name) {
      params['name'] = formData.name
    }
    if (formData.description !== this.theme.description) {
      params['description'] = formData.description

    }
    if (formData.topic_img.id !== this.theme.topic_img.id) {
      params['topic_img_id'] = formData.topic_img.id

    }
    if (formData.head_img.id !== this.theme.head_img.id) {
      params['head_img_id'] = formData.head_img.id

    }
    return params
},
1
2
3
4
5
6
7
8
9
10
11
12
13
14
15
16
17
18
19
20
21
22
23
24
25
26
27
28
29
30
31
32
2
3
4
5
6
7
8
9
10
11
12
13
14
15
16
17
18
19
20
21
22
23
24
25
26
27
28
29
30
31
32
当存在改动时,就调用Theme模型类下的updateThemeInfo()方法,这里我们需要实现一下这个模型方法,打开Theme模型类:
// src/models/theme.js

import {
  get,
  post,
  patch,
} from '@/lin/plugins/axios'

class Theme {

  handleError = true
  // 获取主题列表
  async getThemes() {...}
  // 新增主题
  async createTheme(name, description, topic_img_id, head_img_id) {...}
  // 新增主题关联商品
  async addThemeProduct(id,productIds) {...}
  // 获取指定精选主题详情
  async getThemeById(id) {...}
  // 更新精选主题基础信息
  async updateThemeInfo(id, params) {
    const res = await patch(`v1/theme/${id}`, { ...params }, { handleError: this.handleError })
    return res
  }
}

export default new Theme()
1
2
3
4
5
6
7
8
9
10
11
12
13
14
15
16
17
18
19
20
21
22
23
24
25
26
27
28
2
3
4
5
6
7
8
9
10
11
12
13
14
15
16
17
18
19
20
21
22
23
24
25
26
27
28
这里的实现并没有存在什么复杂的逻辑,就是判断下哪些需要提交给后端去更新而已,相对来说,主题下的关联商品调整会相对复杂一些:
async updateThemeProduct(newProducts) {
    // 待新增的主题商品
    let addThemeProduct = []
    // 待移除的主题商品
    let delThemeProduct = []

    const oriProductIds = this.theme.products.map(p => p.id)
    const newProductIds = newProducts.map(p => p.id)

    if (JSON.stringify(oriProductIds) !== JSON.stringify(newProductIds)) {
      addThemeProduct = this._processAddThemeProductArray(oriProductIds, newProductIds)
      delThemeProduct = this._processDelThemeProductArray(oriProductIds, newProductIds)
    }

    try {
      // 判断是否需要发起新增主题商品
      if (addThemeProduct.length > 0) {
        await themeModel.addThemeProduct(this.themeId, addThemeProduct)
      }
      // 判断是否需要发起移除主题商品
      if (delThemeProduct.length > 0) {
        await themeModel.delThemeProduct(this.themeId, delThemeProduct)
      }
    } catch (e) {
      throw Object.values(e.data.msg)
      .join(';')
    }
},

// 待新增的主题商品数组的加工函数
_processAddThemeProductArray(oriProductIds, newProductIds) {
    return newProductIds.filter(newPid => {
      // 这里注意变量的命名,可以让你更好理解这里的含义。
      // 这里在oriProductIds数据里找和newProductIds里id一样的元素
      // 一个新添加的product,它的Id肯定是在oriProductIds里找不到的。
      const product = oriProductIds.find(oriPid => oriPid === newPid)
      return typeof (product) === 'undefined'
    })
},
// 待移除的主题商品数组的加工函数
_processDelThemeProductArray(oriProductIds, newProductIds) {
    return oriProductIds.filter(oriPid => {
      // 与上一个函数同理,只不过是反过来了。
      const product = newProductIds.find(newPid => oriPid === newPid)
      return typeof (product) === 'undefined'
    })
},
1
2
3
4
5
6
7
8
9
10
11
12
13
14
15
16
17
18
19
20
21
22
23
24
25
26
27
28
29
30
31
32
33
34
35
36
37
38
39
40
41
42
43
44
45
46
47
2
3
4
5
6
7
8
9
10
11
12
13
14
15
16
17
18
19
20
21
22
23
24
25
26
27
28
29
30
31
32
33
34
35
36
37
38
39
40
41
42
43
44
45
46
47
主题的关联商品会涉及到新增和移除,那么这里我们通过定义两个小函数来分别去比对表单数据前后的差异从而判断要不要请求相应的接口。这里我们同样需要在Theme模型类下面定义两个模型方法来实现主题关联商品的新增和移除接口调用,因为前面我们在新增精选主题的时候已经实现了关联商品新增的模型方法,所以这里只需要实现移除关联商品的模型方法即可:
// src/models/theme.js

import {
  get,
  post,
  patch,
  _delete,
} from '@/lin/plugins/axios'

class Theme {

  handleError = true
  // 获取主题列表
  async getThemes() {...}
  // 新增主题
  async createTheme(name, description, topic_img_id, head_img_id) {...}
  // 新增主题关联商品
  async addThemeProduct(id,productIds) {...}
  // 移除主题关联商品
  async delThemeProduct(id,productIds) {
    const res = await _delete(`v1/theme/product/${id}`, {
      products: productIds,
    }, { handleError: this.handleError })
    return res
  }
  // 获取指定精选主题详情
  async getThemeById(id) {...}
  // 更新精选主题基础信息
  async updateThemeInfo(id, params) {...}
}

export default new Theme()
1
2
3
4
5
6
7
8
9
10
11
12
13
14
15
16
17
18
19
20
21
22
23
24
25
26
27
28
29
30
31
32
33
2
3
4
5
6
7
8
9
10
11
12
13
14
15
16
17
18
19
20
21
22
23
24
25
26
27
28
29
30
31
32
33
到这里,我们的编辑精选主题页面模块功能就完成了,虽然编辑精选主题的字段元素不少,但是由于其功能特征的不同,实现起来反而比轮播图管理轻松,也有一部分原因是我们在轮播图管理中已经对这种实现思路有所掌握,从这里也可以看出,当我们花时间或者精力去提炼和总结出一些经验之后,通过反复利用,就可以大大提升我们的效率和降低各方面成本。
# 删除精选主题
通过前面几个小节的努力,我们的精选主题管理也即将进入尾声,在本章节的最后一小节我们将实现的是删除精选主题的功能实现,由于功能本身实现起来比较简单,所以这里作者同样推荐读者自己先行动手实现。
在List.vue中,我们已经给每行的主题添加了一个删除按钮,并监听了相应的点击事件,我们只需要在点击事件的回调方法中向后端接口发起请求删除这个主题即可,具体实现如下:
<!-- src/views/operation/theme/List.vue -->
<template>
   <!-- 省了一堆代码 -->
</template>

<script>
import ThemeModel from '@/models/theme'
import Add from './Add'
import Edit from './Edit'

export default {
  name: 'List',
  data() {...},
  created() {...},
  methods: {
    /**获取精选主题列表*/
    async getThemes() {...},
    /**新增按钮点击事件*/
    handleAdd() {...},
    /**编辑按钮点击事件*/
    handleEdit(id) {...},
    /**删除按钮点击事件*/
    async handleDel(id) {
      this.loading = true
      const ids = [id]
      try {
        const res = await ThemeModel.delTheme(ids)
        this.$message.success(res.msg)
        this.loading = false
        this.getThemes()
      } catch (e) {
        this.loading = false
      }
    },
    /**监听子组件的返回按钮事件*/
    handleBack() {...},
  },
  components: {...},
}
</script>
1
2
3
4
5
6
7
8
9
10
11
12
13
14
15
16
17
18
19
20
21
22
23
24
25
26
27
28
29
30
31
32
33
34
35
36
37
38
39
40
41
2
3
4
5
6
7
8
9
10
11
12
13
14
15
16
17
18
19
20
21
22
23
24
25
26
27
28
29
30
31
32
33
34
35
36
37
38
39
40
41
这里我们在删除按钮的点击事件回调处理方法里调用一个Theme模型类下的delTheme()模型方法,这个模型方法会向后端发起一个删除主题的请求,模型方法的具体实现如下:
// src/models/theme.js

import {
  get,
  post,
  patch,
  _delete,
} from '@/lin/plugins/axios'

class Theme {

  handleError = true
  // 获取主题列表
  async getThemes() {...}
  // 新增主题
  async createTheme(name, description, topic_img_id, head_img_id) {...}
  // 新增主题关联商品
  async addThemeProduct(id,productIds) {...}
  // 移除主题关联商品
  async delThemeProduct(id,productIds) {...}
  // 获取指定精选主题详情
  async getThemeById(id) {...}
  // 更新精选主题基础信息
  async updateThemeInfo(id, params) {...}
  // 删除精选主题
  async delTheme(ids) {
    const res = await _delete('v1/theme', { ids })
    return res
  }
}

export default new Theme()
1
2
3
4
5
6
7
8
9
10
11
12
13
14
15
16
17
18
19
20
21
22
23
24
25
26
27
28
29
30
31
32
33
2
3
4
5
6
7
8
9
10
11
12
13
14
15
16
17
18
19
20
21
22
23
24
25
26
27
28
29
30
31
32
33
定义完毕之后,让我们回到浏览器中刷新一下页面,尝试删除一个主题:
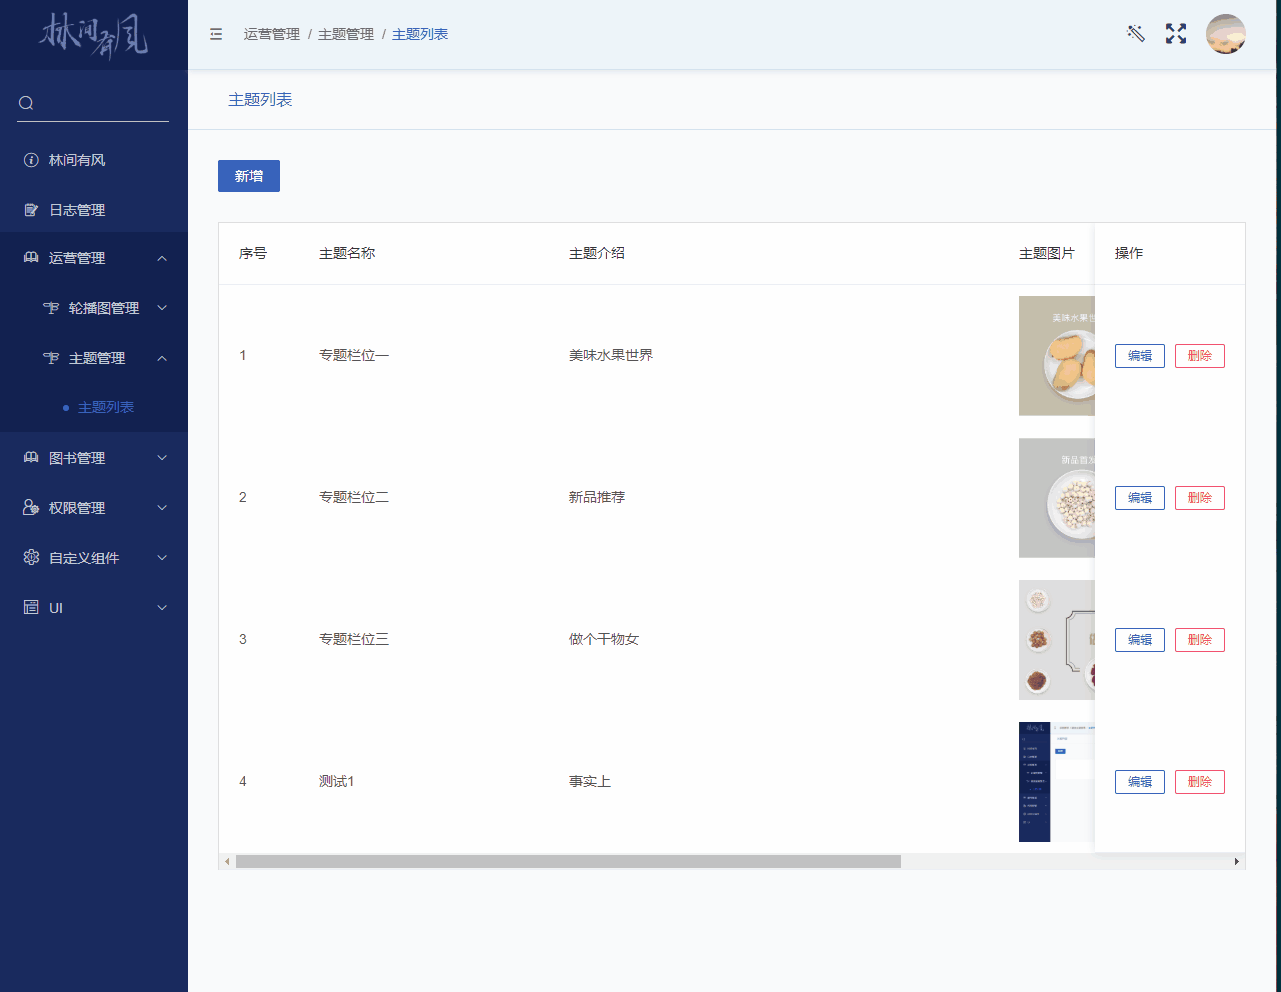
可以看到主题已经从列表中消失了,但是这里也暴露了一个很明显的问题,那就是整个删除的操作过程太过于简单粗暴,更加好的做法应该是点击删除之后弹出一个可以提供二次确认的对话框,点击确认之后才真正执行删除,由于相关的知识点前面已经均有涉及,这里的交互逻辑完善就留给读者们自己动手实现了。
# 章节回顾
本章节我们实现了对精选主题内容的查询、新增、编辑、删除的管理功能。如章节开篇所讲,本章节除了实现页面功能模块以外,主要还是对第十五章中的一些知识点做一个巩固和练习。我们可以发现,在前端工程的开发中,出现重复实现的情况还是比较多见的,在一开始我们可能由于经验或者时间上的不足,不会去提前考虑和规格组件的设计和函数封装,然后一直不停的重复写同样的逻辑,如果项目本身的生命周期较短那无所谓,开发完就算了。如果是需要长期迭代和维护的项目那么读者就要警惕了,最好是提前做一些预设计。最后,这里留一道思考题,通过两个章节的实战练习,现有的代码中,还有哪些重复的代码可以再优化一下使得更便于使用呢?
0/140
评论
0
- 上一页
- 首页
- 1
- 尾页
- 下一页
- 总共1页